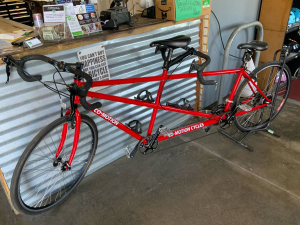
In a survival situation you will want a bicycle. This will allow you to:
- Get around quickly
- Get around quietly
- Transport items
- Save fuel
- Have EMP proof transportation
Any half-decent mountain bike will do, as we are going to augment it. In my area, I found a Cannondale XL my size for $300 on Craigslist without trying too hard. You can probably find mountain bikes with good bones for $100 if you have a keen eye.

Now we convert our bicycle into a survival bike with the installation of durable tires, pre-slimed inner tubes, a rack for transporting items, the addition of pannier bags, and a comfortable seat.
| Key insights: • Practice changing a tire. Don’t fumble around with instructions in a survival situation • You won’t have time to get fit to ride, so stay fit by working out regularly |
Pannier Rack and Pannier Bags
Your bags will sit on both sides of this rack. Choose a rack that’s easy to get on and off and can hold a minimum of 20kg. Many are only rated for loads well under 20kg.
The pannier rack will attach to the seat post or to eyelets on the seat stays.
My preference is a pannier rack with a flat platform to give me the option of attaching a third bag to it.
Choose waterproof pannier bags that can hold 20 liters. That’s the size of small camping backpack, so you’ll be able to fit plenty more than your tool kit in your bags.
When packing the bags, even the loads on either side, and pack the heavier items first to give the bike a lower center of gravity. Your bike will respond a little more sluggishly with the load and takes getting used to.
Keep some elastic straps looped around the rack to fasten items that don’t fit in the bags.
Comfortable Seat
This is where you don’t want to save on cost. A comfortable seat will depend on your own pelvic anatomy and the type of riding you will be doing. Most bike shops will have a tool to measure your ideal seat. I find a wider saddle with wider nose most comfortable for long rides.
Tools
- Allen keys
- Chain remover
- Tire lever
- Multi-tool with pliers and screwdriver. Ensure that they fit all the bolts and screws on your bike.
- Small pump
- Chain lube
- Patches and glue for tire repair – carry double what you think you need
- Duct tape for multipurpose fixes
- Tire slime or inner tubes pre-slimed
Tires
Get puncture resistant tires. I’ve had good experiences with Schwalbe Marathon Plus tires. They’ve got a 5mm thick puncture guard. The tires are pricey, but robust and worth lessening the risk of having to fix a tire while on the road.
Knowledge
Know the route to your destination before you head out. Memorize different routes to get to your usual locations.
Practice repairing your inner tubes both by taking off the tire and also without removing the tire. It will be difficult at best to change a tire under duress without having practiced it.
Fitness
Ride as much as you can, everyday if possible, as riding endurance feels very different than walking or running. Stay fit in other ways to keep overall endurance and strength up. Go for a weekend ride if possible to know how it feels to travel a long distance. You’ll also know if you should get a new seat… or a new bike.
We have a home workout guide for exercising using no equipment and in limited space.
